Step 1: Power Up
🔌
Power Up
Getting the physical connection right is the first step toward precision climbing.
- Plug the power cable into a standard dedicated outlet.
- Ensure the Wi-Fi antenna is screwed on firmly before starting.
- Wait for the status light to indicate the device is in setup mode.
Step 2: Connect to WiFi
📡
Connect to WiFi
Establish a direct link between your device and the LZRvision projector.
- Search for and connect to the Wi-Fi network named
laser_prov. - Open a web browser and navigate to 192.168.4.1
- Ignore any "No Internet Access" messages — this is expected.
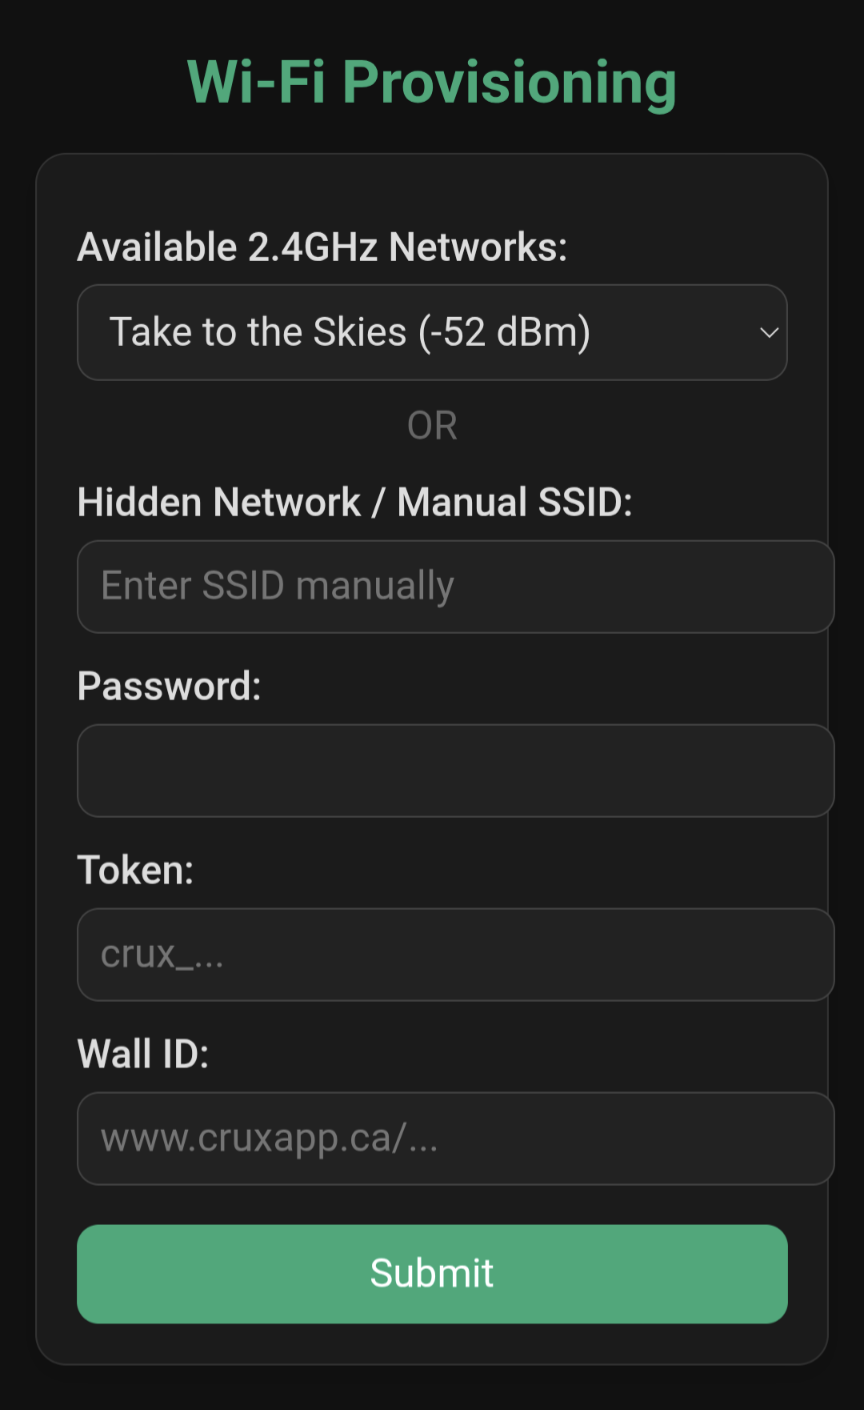
Step 3: Configure Device
⚙️
Configure Device
Link the projector to your home network and the Crux ecosystem.
- Fill out the entire form (SSID, password, Crux API token and Wall ID).
- Get your token from: Profile → Settings → API Authentication → API Key
- Get your Wall ID from: Gym front page → Share icon (paste the entire URL)
- Press Submit and wait to be redirected to the success page.
View Reference Screenshots

Tip: Save your Crux API token and the Wall ID link somewhere safe before proceeding.
Once the device connects to your home Wi-Fi network, you will temporarily be
unable to access these pages while connected to the setup network.
Step 4: Activate API
🚀
Activate API
Finalize software integration through the Crux app.
- In the Crux app: Gym Settings → Gym Webhooks → Enable API Features.
Step 5: Calibration
🎯
Calibration
Ensure the camera can see your holds clearly.
- Mount the projector (ideally on a tripod) to capture the entire wall.
- Reboot the device once positioned to trigger the baseline scan.
- Ensure no movement happens during the initial scanning phase.
- Wait for the hourglass to become a checkmark.
- Activate climbs and start sending!
General Notes
Important information for optimal projector operation
- There is a tripod (not included) mount on the bottom of the device for easy positioning. It is highly recommended to use one for optimal results.
- It takes ~20 seconds to connect to the server. The first climb, or climbs with different background images, take 15-20 seconds to project. Subsequent climbs on the same wall image take 3-5 seconds.
- If the device is moved, it must be rebooted. The holds are detected using an image taken at the very beginning of powerup, moving it after that point will result in incorrect projections.
Troubleshooting
Common issues and how to resolve them
- The projector setup interface can be accessed in a browser on the same network at lzrvision.local. Alternatively, find the device's IP address from your router and go to
http://[device_ip]. If the token or wall ID have been entered incorrectly, use the reset option to restart setup. - The wi-fi configuration page is only available when the projector cannot connect to wifi. The wifi antenna can be temporarily removed to re-enter setup mode.
- If it projects a Wi-Fi symbol after startup, check for the
laser_provWi-Fi network. If it exists, the device failed to connect. Check Wi-Fi SSID and password. The network needs to be 2.4GHz; most home networks are both 5GHz and 2.4GHz, which works fine. - If it projects an X when trying to project a climb, it cannot match the wall picture with that in Crux. Make sure you are projecting a climb that the projector can "see".